帮助中心
EPROLO 团队的建议和解答
如何设置定制产品?
1.将定制产品导入Shopify商店
Customize Text Products

定制图像产品

2. 编辑代码
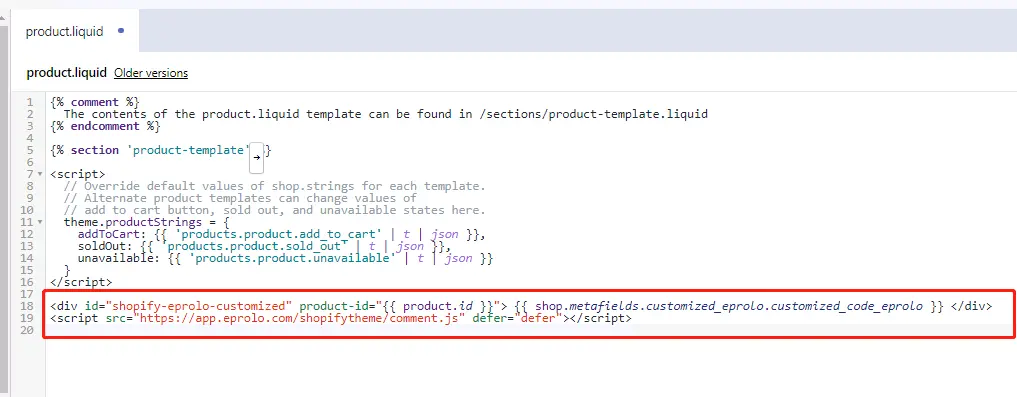
2.1 打开菜单:Online Store-->Themes-->Action-->Edit Code-->Templates-->product.liquid
将以下代码添加到 product.liquid 的底部:
<div id="shopify-eprolo-customized" product-id="{{ product.id }}">
{{ shop.metafields.customized_eprolo.customized_code_eprolo }} </div>
<script src="https://app.eprolo.com/shopifytheme/comment.js" defer="defer"></script>
2.2 获取您的产品 ID
Products-->All products-->Editing Product:获取浏览器顶部的商品ID

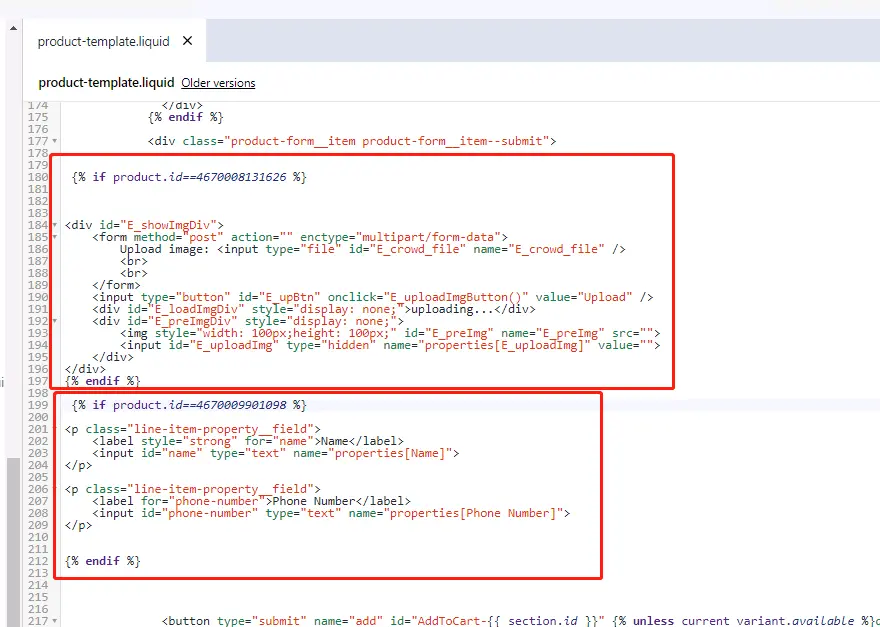
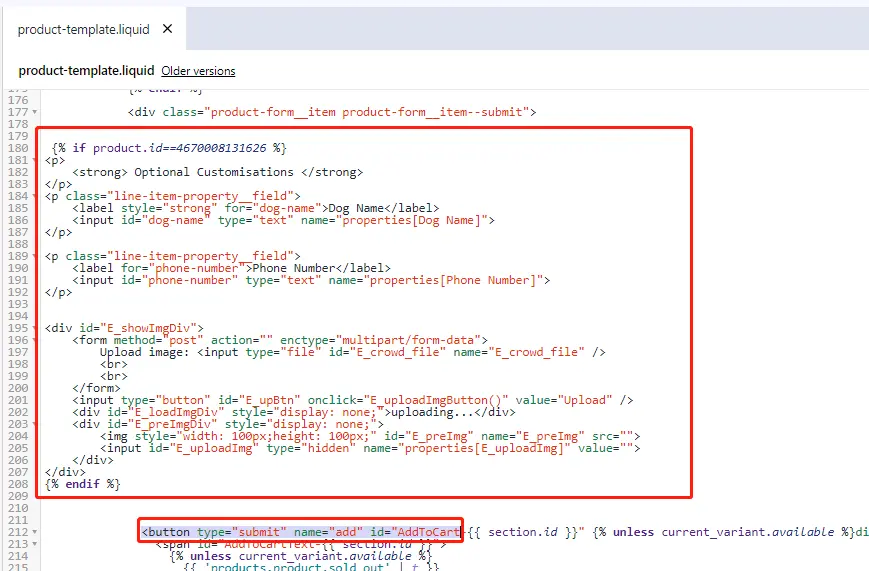
2.3 打开菜单:Online Store-->Themes-->Action-->Edit Code-->Sections-->product-template.liquid
在按钮 AddToCart 之前添加自定义代码
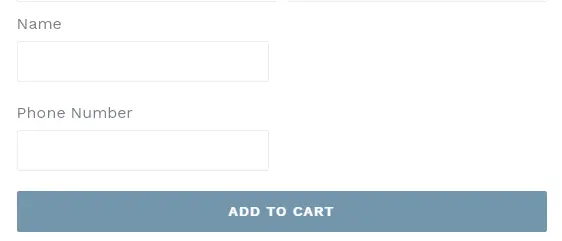
- 自定义文本代码(将红色部分替换为您的产品ID。):
{% if product.id==4670008131626 %}
<p class="line-item-property__field">
<label style="strong" for="name">Name</label>
<input id="name" type="text" name="properties[Name]">
</p>
<p class="line-item-property__field">
<label for="phone-number">Phone Number</label>
<input id="phone-number" type="text" name="properties[Phone Number]">
</p>
{% endif %}

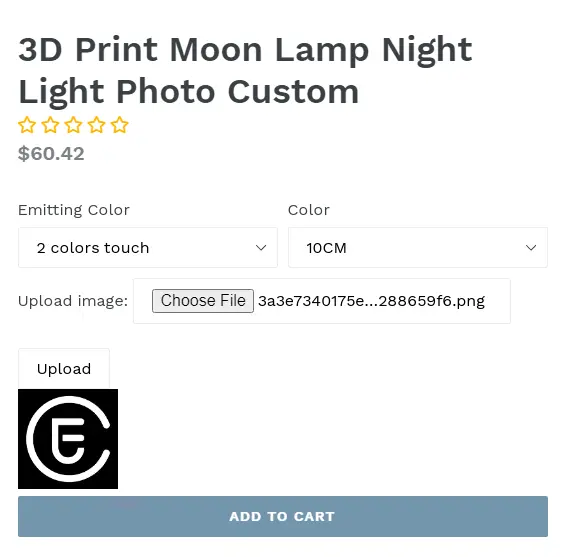
- 自定义图像和上传代码(将红色部分替换为您的产品 ID。)
{% if product.id==4670008131626%}
<div id="E_showImgDiv">
<form method="post" action="" enctype="multipart/form-data">
Upload image: <input type="file" id="E_crowd_file" name="E_crowd_file" />
<br><br>
</form>
<input type="button" id="E_upBtn" onclick="E_uploadImgButton()" value="Upload" />
<div id="E_loadImgDiv" style="display: none;">uploading...</div>
<div id="E_preImgDiv" style="display: none;">
<img style="width: 100px;height: 100px;" id="E_preImg" name="E_preImg" src="">
<input id="E_uploadImg" type="hidden" name="properties[E_uploadImg]" value="">
</div>
</div>
{% endif %}
3. 多款定制产品
当有多个定制产品时,只需添加几份相同的代码即可。 您需要做的就是更改产品 ID。
